October 16, 2014 Hours spent building to date: 225
Cut the straight part of the keel to correct dimensions. After a 20-foot cut in 1 1/2-inch old growth Douglas fir, even the Festool saw was running a little hot. The keel looked good and sat flat, so I glued it to the frames after getting everything as plumb vertically as I could. That’s the idea behind putting on the keel now — the frames are pretty flippy just sitting there on their uprights and the keel should steady everything up.
Cut the strips for the curved part of the keel and glued them up. The assembly was rocking up and down on the frames, and didn’t look like a great fit, but then I cut about 3/8-inch off the high spot and it fell right into place.
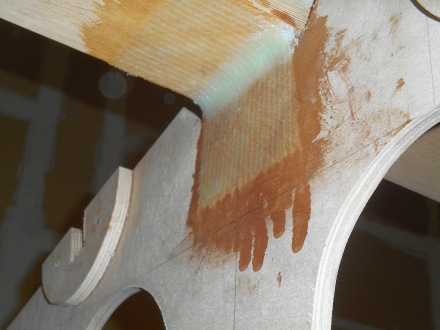
Then I had an inspiration that cost me a day. I have done fiberglass sheathing a couple times, but have never done any tabbing — making a very strong joint between two perpendicular pieces of wood by filling the angle between the two with a “cove” of epoxy and covering the whole thing with fiberglass tape. The engine stringers that are going in next are very heavy, so I want the frame to be rock solid, so I thought I would tab the keel to the frames using some 15-oz biaxial E-glass tape that I bought for another project, but never used. Very strong, very high tech stuff.
I fooled around with various homemade coving tools for a long time, trying to get a compromise between a nice, smooth cove and one that was deep enough to add strength. Finally cut a piece of West System plastic spreader to a roundish shape and the coves were okay, but messy. Then I tabbed in the E-glass and found that when you “wet it out” with even more epoxy, it really smooths out the coves. I couldn’t believe how much epoxy 15-oz cloth soaks up. The price of oil rose $1 today, and I’m pretty sure that was me.
Working overhead for hours on an unfamiliar task with epoxy dripping down on everything was exhausting, but that keel ain’t going anywhere. And I won’t have to comb my hair in the morning — it’s all glassed into place.

Stepped laminations make it easer to cut the scarf when the glue dries. (Yes, I cleaned up the squeezeout.)


Sounds like you need to wax your hair/head before work so you can get that “quick release” action. That way you can just lift up the perfectly fitted “epoxy hat” after you’re done.
LikeLike
Great idea — then I will have a set: my 4200 hat, my West polyether hat and my epoxy hat.
LikeLike
Those little white threads are PES (polyester), for some reason it remains visible even if you infuse a fabric stack. Some sort of wettability issue.
Glass looks wetted out, could perhaps use a little more, lightly thickened resin.
Great project! Beautiful woodwork. Good luck with it.
LikeLike
I had some WEST 207 Special Coating Hardener from another project, and I put a coat of that on, too. It wet out the polyester and put a nice finish on the tabbing.
LikeLike