

August 10, 2014
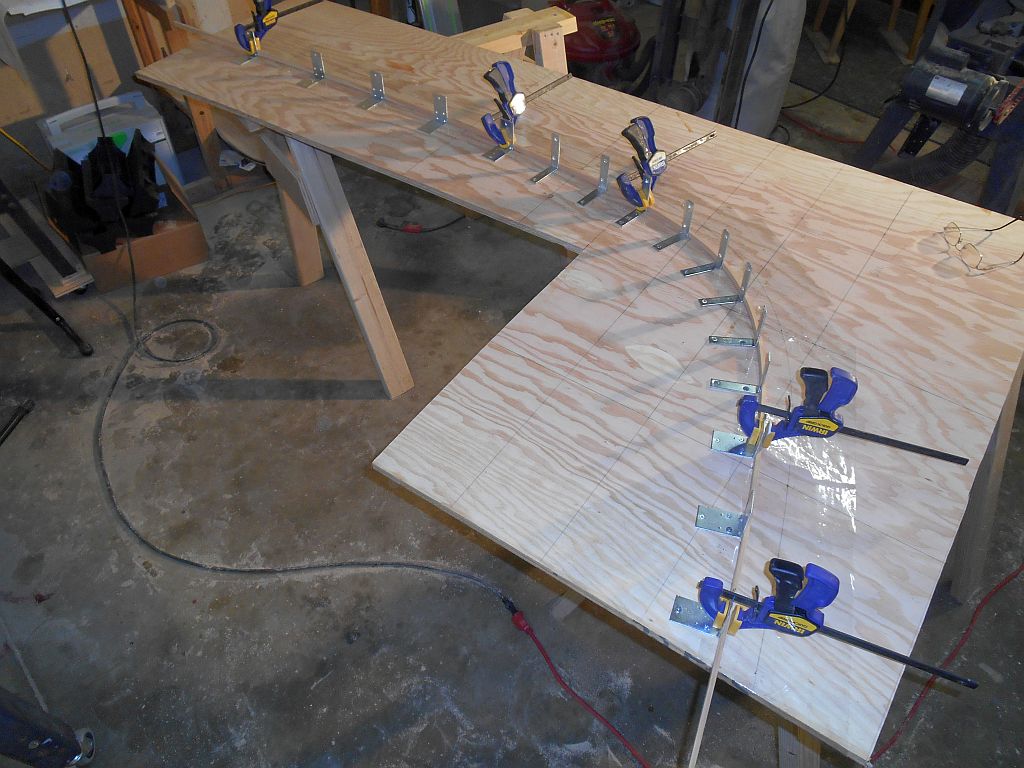
Since large, curved timbers even for a boat the size of Tardis are hard to come by these days, many pieces of wooden boats (and even whole boats) are laminated. Lamination is simply gluing together strips of wood with epoxy after bending them around a form. The stem, keel and fore-and-aft stringers for Tardis are all laminated, so I’ll be doing a lot of glue-ups.
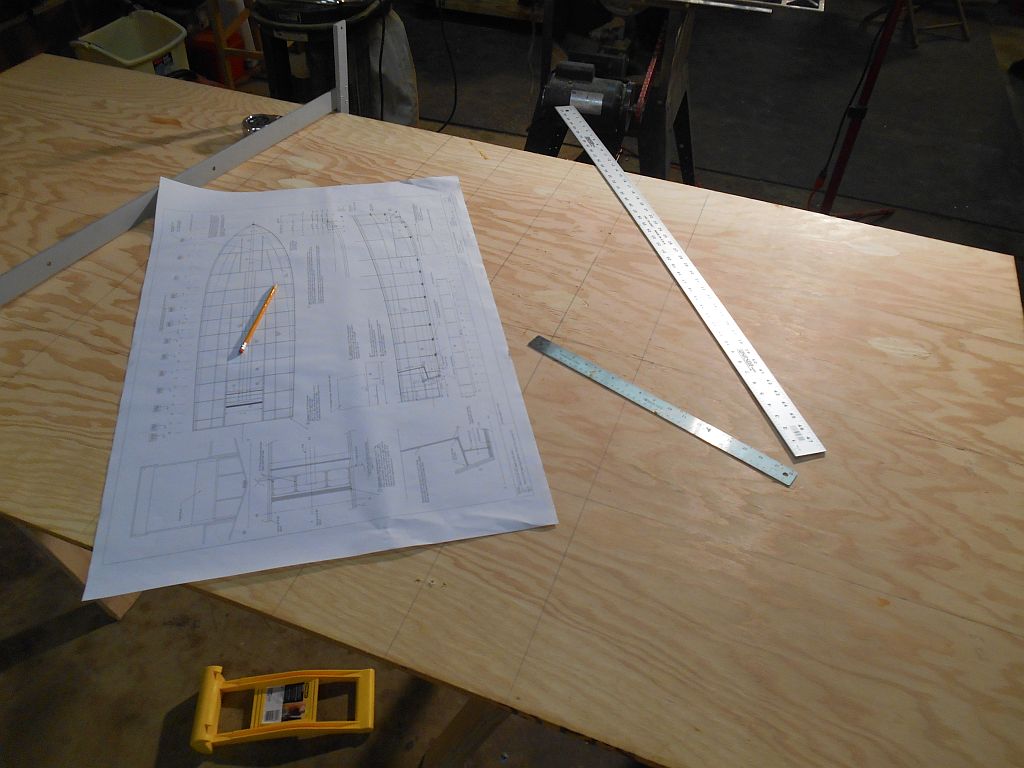
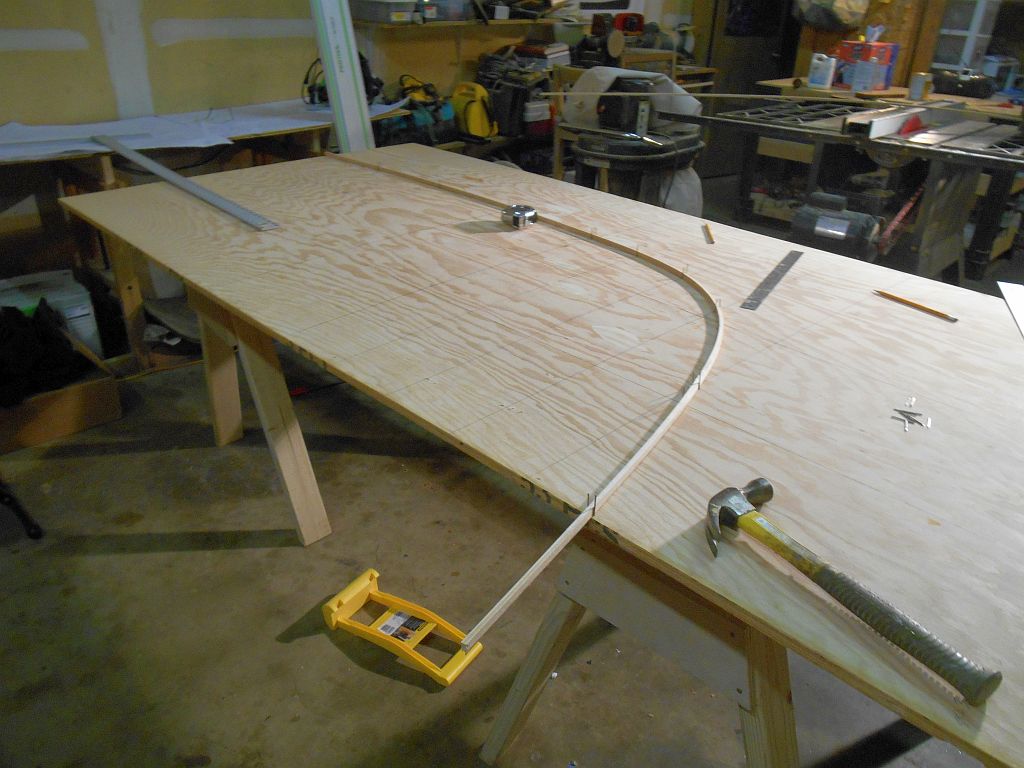
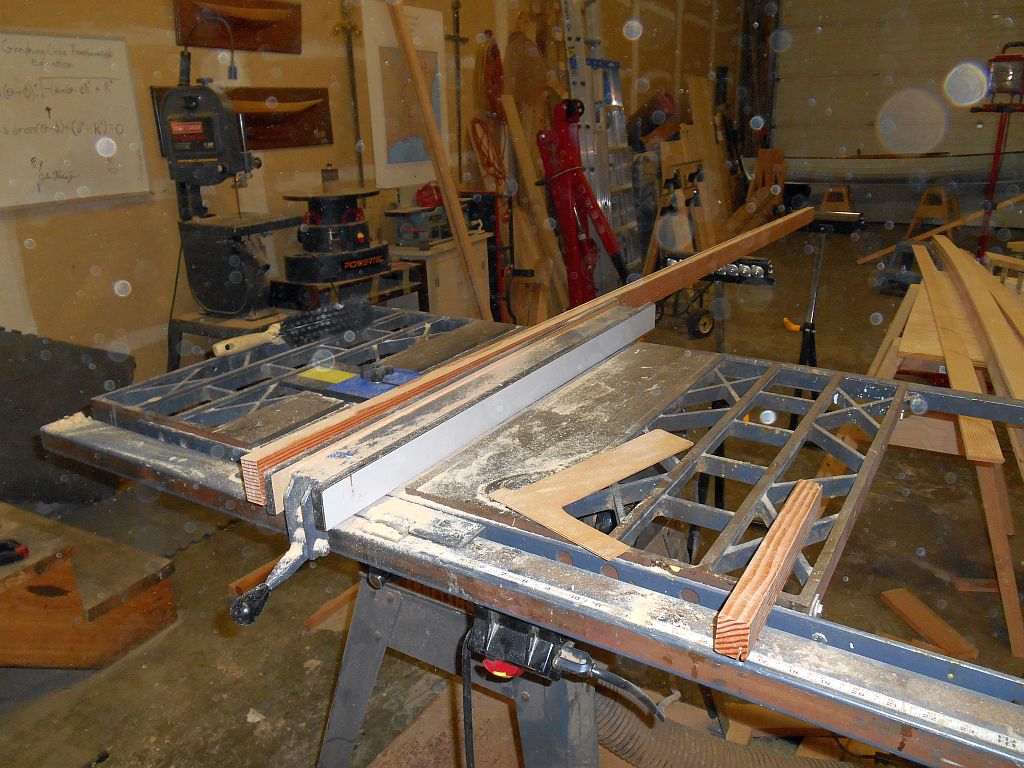
The stem is as close to traditional “lofting” on Tardis as your going to see. “Lofting” is a very tedious process by which using a table provided by the designer, you create a full-size drawing of the boat on great, big sheets of plywood the size of the boat, then take all the patterns and measurements off that. Mark’s method is much simpler. The shapes of all the major pieces are drawn out on a grid of little 3/8 inch squares. You draw a series of 6-inch squares on a piece of plywood and simply put dots on the big squares where they were on the little squares using dozens of measurements drawn out on the grid. Then connect the dots using a thing springy piece of wood called a batten for the curved bits, and a big straightedge for the straight ones.
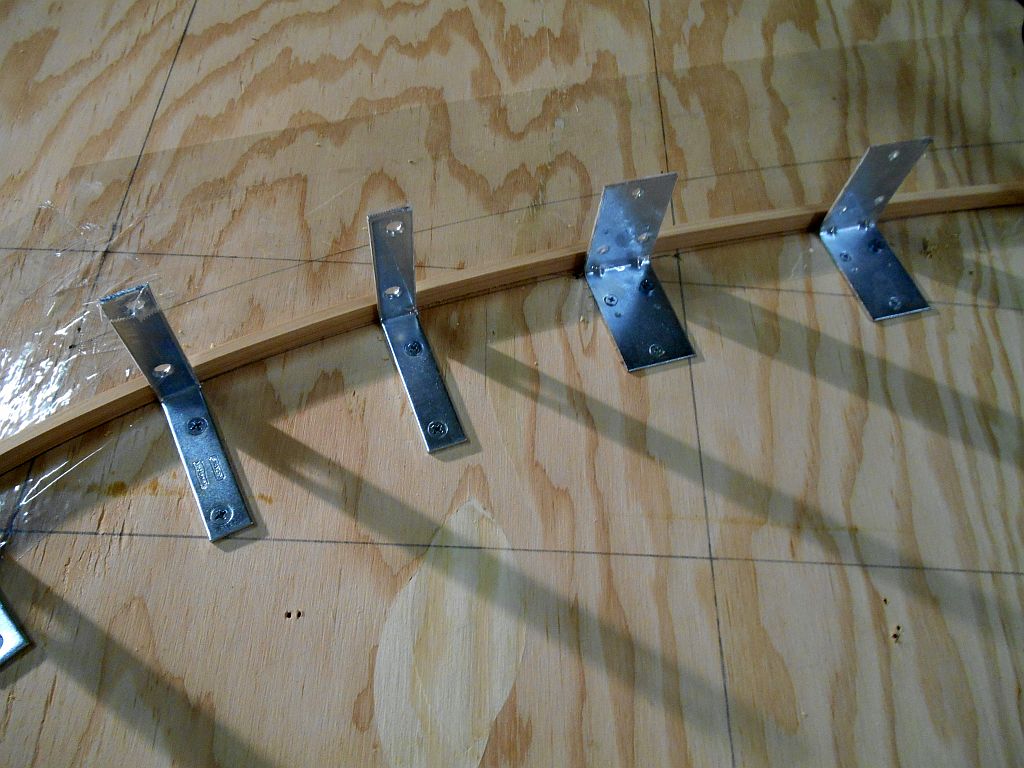
So I drew out the grid and marks for the stem on a big piece of plywood, and put inexpensive steel “L” brackets from Home Depot all around which to bend the laminations. For little boats, I bend around little pieces of wood. For the husky two-inch square stem on Tardis, steel.
When I bent the batten around the marks, bang, it hit them perfectly, a good sign for Mark. When they don’t, it means the offsets are off, or the designer is trying to force the wood into a shape it doesn’t like. I think unfair lines are less likely on boats drawn with the help of a computer, but I was reassured nevertheless.
Then, even for a trailer trawler like Tardis, I needed 28 strips of 2 inch X 9 foot Douglas fir for the stem laminations. I am very lucky that my local lumber yard (Rings End) has a large supply of perfectly clear, straight fir that someone ordered for a deck and didn’t use. On my last lamination project, I had to cut around knots and crooked pieces, and probably ended up throwing out half the strips.
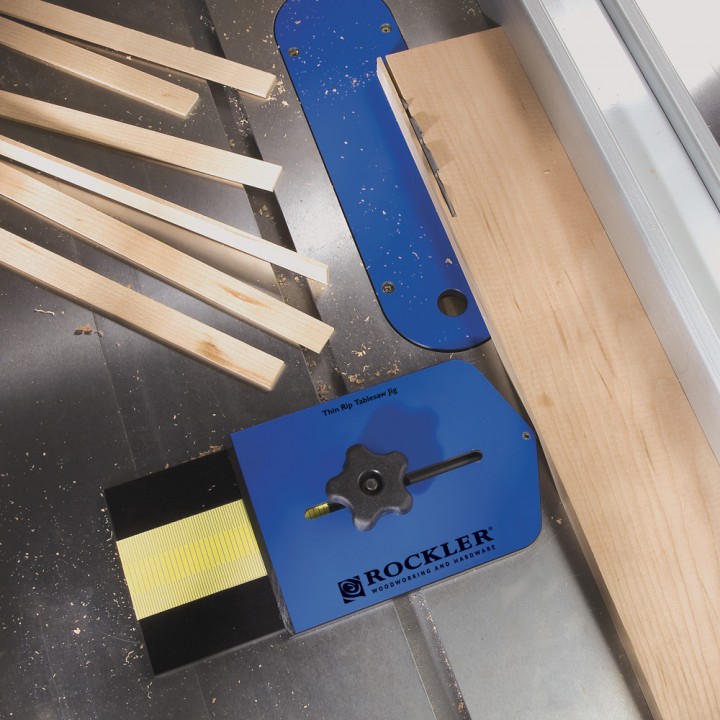
Here is a huge tip if you are ever going to build a laminated boat: Rockler Hardware has an inexpensive plastic strip-making jib that works like a charm. (http://www.rockler.com/thin-rip-tablesaw-jig) You set it up on your table saw on the far side of the blade and rip guide. Then set your width, and as the strip runs through the saw it passes by a steel bearing. Keep moving your rip guide toward the bearing over and over again until you are down to the last strip, and it will duplicate your first strip exactly.
Here’s how I scientifically decided the width of the strips: cut one 1/4-inch, put it on the bending jig and it broke. Cut one 3/16-inch, bent it around the jig, and it broke. Cut one about 5/32-inch and it around the jig and it didn’t break. Went with 5/32-inch.

Can’t make the layout squares without a giant dry wall T-square.


Leave a comment