

August 5, 2017 Hours spent building to date: 3,881
Hauled the Tardis week before last at Brown’s Boat Yard and found exactly what I expected: no prop on the thruster. But also what I did not expect: absolutely no sign of stress or damage that would make the prop sheer off.
So I think the problem was simple builder error (and the builder would be me): the allen screw that holds the prop on is metric. I don’t have a set of metric allen wrenches, so I used the closest imperial, which was a little loose. But working with my hand up in the tiny bow thruster tunnel, I distinctly remember thinking, “Well, that seems pretty tight.”
But it was fortunate in a way that I had the boat hauled, since it also revealed another nagging problem. All the cabin house leaks have been fixed. There is still water getting into the bilges from the cockpit, but only when it rains, and it is minimal. But once in a while, I would notice a buildup of water way forward in the boat — near the bow thruster. And it was salt water, which is bad because that means it was getting in below the waterline. I used plumbers putty to isolate the forward limber holes and measured about 6 ounces per hour of buildup. But over 24 hours that’s over a gallon — too much since a bilge pump failure could cause pretty major damage.
Careful examination of the thruster tube revealed a tiny crevice in the hull near the bottom of the starboard side. I remember being very proud of the tight fit I had achieved installing the tunnel, but I would have been a lot better off with a big gap jammed full of epoxy. All epoxy-based fillers shrink during the exothermic reaction that makes them so tough, and I think the filler simply shrank itself into a little crack.
That meant a lot of work, since the absolutely foolproof way to fix this is to remove all bottom paint, totally wrap the joint between the tunnel and hull with strips of epoxy, fill them with clear epoxy three times, and fair out for a smooth transition to the hull. This is a lot of work, but leads to a totally impervious joint, since afterword there is no joint, as the thruster tunnel becomes part of the hull.
The leak is gone, the prop is on tight with Loc-Tite and the right wrench, and the bilges all the way aft to where cockpit water leaks are dry. This makes me happy, but what does not make me happy is the $400 bill for a haul and relaunch versus the 80 cents it cost me at Page Hardware for the right size metric allen wrench.
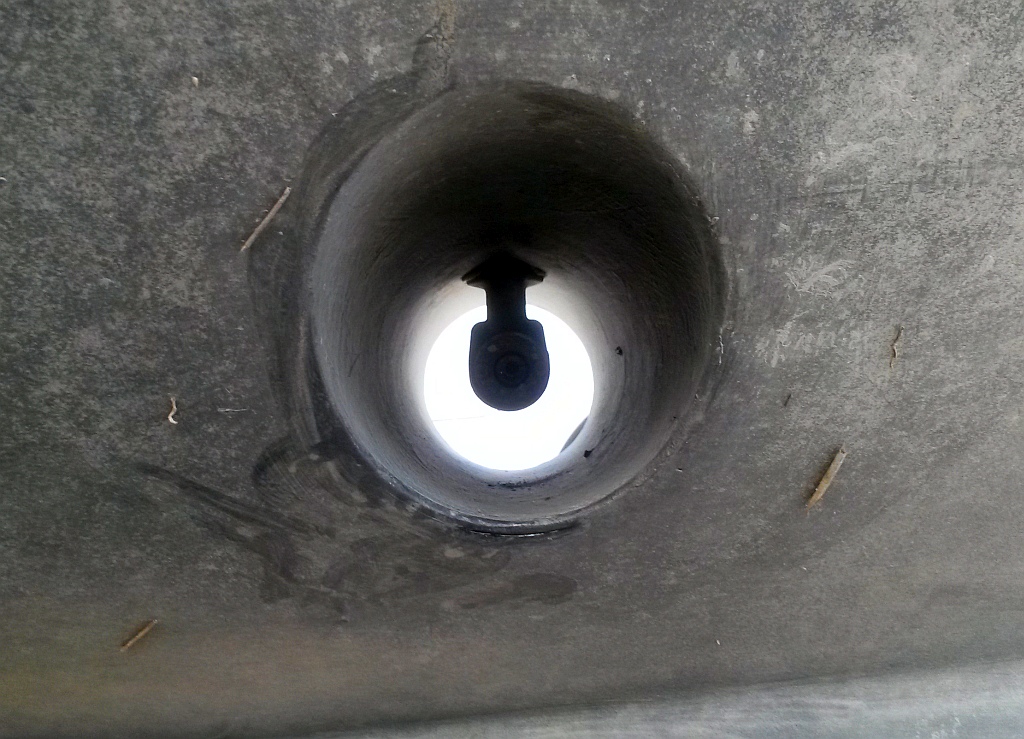
Yup, there is no prop in there.
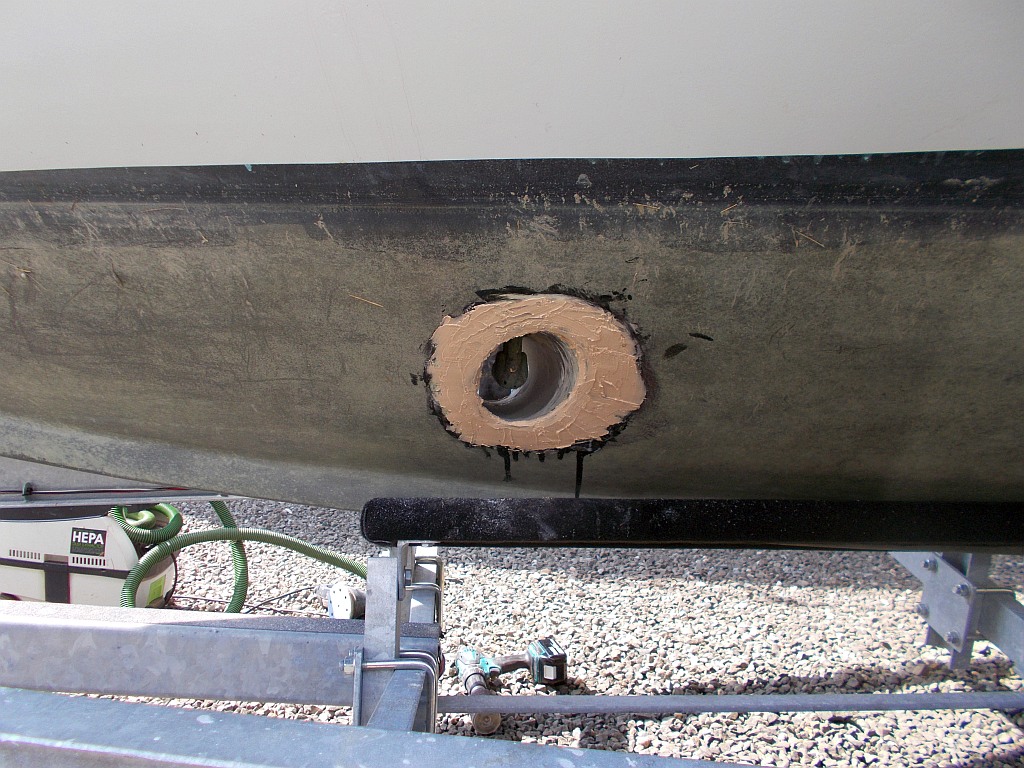
First round of fairing after fiberglass.
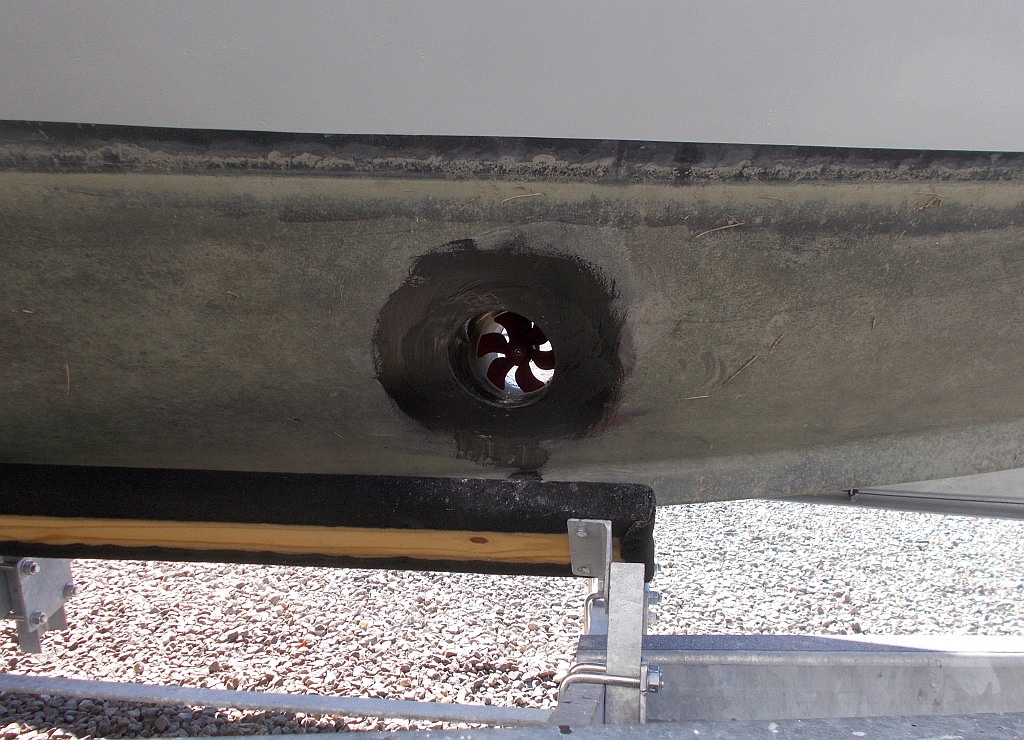
Back in business — faired, prop locked back in, bottom paint on.


Leave a comment